Showing posts with label Country Recipes. Show all posts

February 20, 2013

Quiche - A Yummy One.

I think quiches fit into that category of food that can be either really good or really horrible.  Nothing is worse than a quiche with too much egg and not enough proper filling in my opinion.  However a good quiche is a fabulous thing.

Look - here's one I made a week or so ago.  (I came so close to writing "here's one I prepared earlier" but managed to stop myself.)

Rustic Quiche

Needless to say it looks a bit rough and ready around the edges.  Most things I make do but they taste OK so we run it with it.  (I am hopeless at frou frou food.)

Anyway, back to the quiche.   I thought I would pop the recipe up on the blog as it is a handy one to have and very simple.  The trick to this involves the fact that its made with what I call "melted pastry."  So much easier than normal pastry which I fail at regularly.

So here goes.

Ingredients - Pastry

  • 135g butter
  • 55mls of milk
  • pinch salt
  • 1 and a 1/2 cups of SR flour

The pastry is super easy.  Basically you throw all the above ingredients in a pot and stir over low heat.  I know this breaks all the usual pastry rules which seem to involve iced water and rubbing in of butter and so on.  No need to be gentle with this stuff though.  Get in there and stir the living daylights out of it.

Melted Mess


When it is all mixed don't try and roll it out.  Rather just push it into your quiche dish (which has been greased prior) with your fingers.  A bit like a biscuit base for a cheesecake but this stuff is much stickier and should stay together more.

With Finger Marks And All

I do take the time to blind bake this.  Just pop some baking paper on top and then some dry rice or baking weights if you have them.  Bake on 180 degrees for about 10- 15 minutes and then pull out before the sides brown at all.  The pastry will have puffed up in this time.  I use a glass and just push it down again.  You really can be quite rough with this pastry and it makes no difference.

Pushing Pastry Back Down


Let it cool a little while and get on with the filling.

Ingredients - Filling

  • 300ml of cream
  • 3 eggs
  • anything else you feel like that is vaguely quichey
I made a leek, mushroom and bacon quiche as that is my favourite.  Filling wise anything will do but be generous.  If you are using fresh tomatoes just place thin rounds on top before baking as chopped up tomato mixed through is too watery and the filling won't set properly.  In this case I fried some bacon, mushrooms and leeks in a pan until they were soft but not brown.

Lovely

In a bowl mix the eggs, cream, filling (I also throw in some grated cheddar and parmesan cheese), salt and pepper.  Pour into pastry case and put in oven at 180 degrees until the top is set and browned slightly.

The whole things is very easy and extremely yummy.  Worth a try if, like me, you baulk at making pastry.

February 1, 2013

Pesto For Aliens.

I have been inspired to cook a lot more since our return from holiday.  Admittedly part of that inspiration has come from the fact that we originally intended to have a small BBQ on Saturday night that somehow seems to have swollen into a substantial but hopefully casual dinner party.  So I have been working away in the kitchen getting myself organised.

My vegie patch didn't fare well over January but one thing I did come home to was a glut of basil.  I love basil.  Even the smell on my hands after picking it makes me happy.  All summery and gorgeous.  Anyway I decided the vast amounts of basil I had accumulated, combined with this post over at Babymac,  meant that the Cooking Gods were directing me to make pesto.  So I dusted off the food processor and got amongst it.  Interestingly my recipe for pesto is very similar to Beth's, except I use cashews.  Have done for years, mainly as my Mum is very allergic to pine nuts although to be perfectly honest I am not the biggest pine nut fan in the world anyway.  I think I over dosed in the early nineties when every Perth cafe threw copious handfuls of pinenuts into everything.  (I guess something had to add some crunch to all those sun-dried tomatoes....)

To be honest there isn't really a recipe.  I just sort of make it like this.

Grab a big bunch of basil.  If you grew it yourself give yourself a smug pat on the back as you feel all clever and Maggie Beer-like.

Here's mine.

Just Call Me Maggie

I then pick the leaves and throw them in the food processor with a few decent hunks of parmesan, salt and pepper, a clove of garlic and a good handful of cashews.

Look.

Under Basiled

After I took this photo I decided there wasn't enough basil in there so threw in another handful or so.  Then I just whizzed the whole lot up and drizzled enough olive oil in at the end to make it loose enough to go through pasta as this is my plan as a side dish for Saturday night's soiree.

See - just like this.

Pesto


So yummy.  Although my smug Maggie Beer bubble was burst immediately by Farmboy coming in and saying

"What have you made Mum? It looks like alien puke."

Thanks for that.

PS - Have still got a few more New York posts to go but thought I would space it out a wee bit.

April 2, 2012

Coconut Macaroons. Kind Of.

Now - no-one faint.  I am going to post a recipe.  I know, long time between recipe posts on the blog at present.  Remember back in the halcyon days of this blog when I posted recipes all the time?  Some of them were even good.  (You can pop over to the country recipe heading under the main title if you want to step down memory lane....)

Anyway - less waffle.  Here is a recipe for kind of coconut macaroons.  I am saying "kind of" because I really don't think they reach true macaroon status.  They are pretenders to the macaroon throne but they are still super yummy and incredibly easy.  I use them if people are coming for coffee or to tart up ice cream and chocolate sauce if I want a quick pudding.

Kind Of Coconut Macaroons

Ingredients


  • 2 egg whites
  • 1/2 cup of caster sugar
  • 2 cups of dessicated coconut
Preheat your oven to 180 degress celsius.  Line a baking tray with baking paper.  (Lined trays take out that "sticking to the tray" risk which is just a bore and ruins my day.)  Mix all ingredients in an electric mixer.  It will look all crumbly and fall apart a bit.  Don't panic - it is supposed to look like this.  See.

Crumbly White Mixture

Then just shape the mixture into little balls about the size of a big walnut.  Kind of smoosh it together.  It will be fine - I promise.  Pop the balls on your tray and put it in the oven for about 15 minutes or until they look nice and golden like my first photo.  

That's it.  How easy is that?  I honestly have to hide these from my family to stop them eating them all before I get a chance to use them for whatever I had planned.

I hope everyone out there had a fantastic Monday.  I am feeling weary so am going to head to bed nice and early.

Take care.

February 19, 2012

Spinach and Water Chestnut Dip.

Last night we have people over for dinner.  I followed my own dinner party*  rules and kept everything super simple.  I made this spinach and water chestnut dip.  It is an old recipe of my Mums that is very light and not too unhealthy.  I think it was originally intended to be served in a Cob loaf and it can be served warm.  Last night I served it cold and it was still very yummy.  It is perfect if you have a richish main course planned.

Spinach And Water Chestnut Dip


So - here we go.

Ingredients for Spinach and Water Chestnut Dip


  • 1x 300g tub of sour cream (I use light)
  • 1x 230g tin of water chestnuts
  • 1 box of frozen spinach (You can use fresh - just wilt it in a pan first and cut up finely)
  • 1 packet of French Onion Soup mix

First of all defrost the spinach in a strainer on the sink.  This lets all the extra water drain away and stops the dip being too watery and soggy.  Drain the water chestnuts and chop them finely.  (I should have taken some method photos but it is hard to make a photo of chopping water chestnuts look at all attractive.)  In a bowl mix the sour cream, thawed spinach and chopped water chestnuts.  Then add about half the packet of French Onion Soup Mix.  Give it a good stir and then taste it.  You may need to add a little more soup mix to taste.  Then just pop it in a serving dish.  That's it.  Too easy!

I would normally serve this with plain rice crackers or bread.  It also works well with crudites if you are feeling very virtuous.

It is hard to make a plain white dish of green gloop look appetising in a photo

*  In regards to the dinner party rules - I think I may have gone a bit hard on rule 3 last night.  The Farmer has just got up and he looks decidedly seedy and rough around the edges.....

November 22, 2011

Super Special Chocolate and Caramel Slice.

Mmmm - a little bit of baking has been going on here at The Farm.  I had a sudden urge to bake something disgustingly unhealthy.  Then I remembered this old favourite caramel slice. Various forms of this recipe have been around for years and I can remember eating it as a child.  It fits in the "oldie but goodie" section of my recipe file.

Anyway, as Christmas is coming up, I thought everyone might like it.  It is really easy to make but a little bit fiddly as you have to wait for the layers to cool.  Definitely worth it though.  It is also super rich and, like many good things, a little bit goes a long way.

Super Special Chocolate and Caramel Slice

Ingredients

Base

  • 1 cup of plain flour
  • 1/2 cup of brown sugar
  • 1/2 cup of dessicated coconut
  • 125g of butter melted


Filling

  • 2 tablespoons of golden syrup
  • 395g tin of sweetened condensed milk (Nestle all the way on The Farm)
  • 60g of butter melted


Topping

  • 300g of chocolate melts (again I use the Nestle ones)
  • handful of pecans

Making the base is super easy.  First line a slice tin (I use a rectangular one roughly 20x30cm).  Then mix all the base ingredients together and press it into the tin.  Bake for about 15 minutes at 180 degrees.  Take out of oven and set it aside to cool.

OK - the caramel layer is a little bit trickier.  Empty your condensed milk into a pot.  I always think of condensed milk as "Nestles milk", with Nestles pronounced to rhyme with wrestles, as that was what we called it when I was growing up.  None of this fancy "Nestlay" business in my 1970s-80s childhood.  Anyway, digressing.  Add the melted butter and golden syrup to the pot and cook it over a low-medium heat.  You need to whisk it continuously during this time.  It will take about 7-8 minutes and will gradually thicken and became a golden caramel colour.  Resist the temptation to leave it, even for a second, as it will burn.  I have learnt this the hard way.  When it is a lovely gooey caramely mess pour it over the cooked base.  Bake it in the oven for 10 minutes.  It should come out looking a bit like this.

Bottom Two Layers of Slice

Pop it in the fridge for at least 4 hours but preferably overnight.  All it needs then is the chocolate topping.  I use Melts as I can microwave them.  Basically I microwave them for 30 seconds at a time and stir in between, until they are all melted.  If you want to be more traditional and go for the double boiler approach, feel free.  While they are melting I roughly chop up my pecans and give them a quick toast in a dry pan.

Toasting Nuts

Then I pour the melted chocolate over the caramel and  sprinkle the pecans over the top.  I would love to say that I arrange the pecans beautifully however I would be lying through my teeth.  I just toss them on top any which way.  I have seen this slice made with a whole pecan in the centre of each piece - it was not made by me though!  The slice then goes back into the fridge until the chocolate is set.

Ta Da! Random Pecans and All.

One more thing (sorry, this recipe is turning out to be longer then War and Peace) if you want to make the slice look pretty when you cut it, use a hot clean dry knife.  I do this by having a jug of hot water there, dipping the knife in it and drying it on a tea towel before each cut.  This is a bit of a hassle but makes it look much less messy.


So there you go. A  very, very yummy slice.  I try and save it for special occasions as otherwise I would be the size of a house.

Take care everyone.

November 10, 2011

Very Old-Fashioned but Non-Authentic Beef Curry. Gourmet Foodie Types Please Look Away Now.

Ok - as promised, here is my favourite every day beef curry recipe.  It is a very un-authentic curry recipe and probably owes a lot more to the tradition of shearers' cooks than Madhur Jaffrey.  It is yummy though and not super hot so very family friendly.  If it offends the traditonalists amongst you, try thinking of it as a curry flavoured casserole as opposed to a real curry.  Anyway - less apologising, let's move on.

This curry is made with good old fashioned curry powder.  It is Keens all the way in our house. Anything that orange has to be good.

Curry Love
 Ingredients

  • 1 teaspoon-1 tablespoon of Keens curry powder, depending on taste and the need to feed small children
  • 700g of cubed steak (stewing steak is fine)
  • 1 onion 
  • 1 apple, peeled and chopped into roughly 1.5cm cubes
  • 1 tin of tomatoes
  • 1 bay leaf, 1 cinnamon stick and a cardamon pod (optional but it makes it look a bit more impressive)
  • salt and pepper

First of all chop the onion up roughly.  Fry the onion in a little bit of oil and add the desired amount of curry powder.  Once the onions are brown and the curry powder fragrant (using the word "fragrant" makes it sound like I know what I am talking about, doesn't it?) add the meat and brown the outside. Add the apple and stir that around a bit too.  Once the meat is brown, tip in the tinned tomatoes and add a little water if needed.  Then if you want to you can add the bay leaf and stuff. I also add a little salt and pepper. It will look like this.

Curry Cooking

Bring the curry to the boil and then pop the lid on, turn the heat right down and let the curry simmer slowly for an hour.  That's it.  I serve this curry with brown rice, some mango chutney and slivered almonds.

The end result looks like this (yours could well look better...)

Curry, Plated Up But Not By A Masterchef (Obviously)

Anyway - I am going to stop blogging now.  The builder is still jackhammering bits of the bathroom floor and I think the time has come to depart the house.

Take care.

September 22, 2011

Secret Ingredient Muffins.

I struggle with what sort of snacks to put in the Farmchildren's lunchboxes sometimes.  By the time I have navigated the no nuts, no junk food rules enforced by the school and child care centre I often find that not many of my recipes suit.  And there is only so much fruit they can eat.  This muffin recipe is super sneaky because the result looks like plain old chocolate muffins but they are actually very healthy.  I love a deceptive kid's snack recipe.  They always make me happy.

The secret healthy ingredient in these muffins is below.

Kidney Beans

Yep - kidney beans.  Now if I gave my kids plain old kidney beans in their lunch there is no way on this earth they would eat them.  (And if your kids do, good luck to you, you have reached ultimate uber Mum status!)  But in these muffins the beans go down no problem whatsoever.

The trick is in the making.

Ingredients


  • 1/2 cup brown sugar
  • 100ml of canola oil
  • 2 eggs
  • 2 teaspoons vanilla
  • 400g tin of kidney beans
  • 1 cup SR flour
  • 1/2 cup of cocoa
  • 1/2 cup of milk
First of all drain those beans.  Then you need to get them all mushed up.  I put them in a jug and puree the living daylights out of them with my stick blender.  If you wanted to go old school you could get out the potato masher and go hell for leather.  Alternatively a mini food processor would do the trick.  Beware leaving any beans whole.  Once kids discover the beans are there, they never forget.

The beans should look like this.

Pureed beans


Then sift the flour and cocoa and add the brown sugar.  Mix all of these dry ingredients together.  Add the other ingredients and stir all together until you get a lumpy batter.

Like this.

Lumpy Batter

Then pop the batter evenly into 12 patty pans in a muffin tin.  Bake at 180 degrees celsius for 12-15 minutes.

Yum.  And with a hidden serve of beans....

Deceptive Chocolate Muffins

August 29, 2011

Braised Steak and Onions: Ridiculously Easy Dinner.

Braised steak and onions, now there is a blast from the past.

Everything is getting a bit hectic on The Farm at present.  My hours at my day job have increased and spare time seems to have gone out the window.  I have resorted to quick and easy dinners, preferably ones that can be pre-prepared.  I have been greatly aided in this task by a gorgeous present my lovely friend Mrs HG gave me. (Just because - don't you love it when someone gives you something just because?)

Look - the huge CWA cookbook.

Braised Steak and Onions
CWA Cookbook Gold

Needless to say I was super excited and the book is getting a workout.

Yesterday I made braised steak and onions.  I must admit to making up my own recipe a little as I have made it before, but not for years. I don't think I have ever been to a country "bring a casserole" dinner where this hasn't been on the menu.

The CWA version looked fantastic but I knew it was probably a bit heavy on the spices for The Farmchildren.  So here is my "family friendly" version.

Ingredients


  • 4 pieces of average sized steak (I used 2 big rumps and halved each)
  • 2 onions
  • 1/4 cup of flour
  • 1/4 cup of tomato sauce (It is Rosella only in house - we are loyal consumers)
  • 2 tablespoons of sugar
  • 1/4 cup of white or apple cider vinegar
  • 1/4 cup of beef stock (or the equivalent in stock powder and water)
  • 1/4 teaspoon of mustard powder
  • 1/4 teaspoon of curry powder
  • 1/2 teaspoon of ground ginger
  • 1/2 teaspoon of mixed spice
OK - the method is so easy.  Cut the onions into thin rings and put in the casserole dish which has a lid.  Place the steaks on top.  Mix the flour with about half the tomato sauce first in a jug or bowl until you have a paste and then add all the other ingredients and mix all together.  Pour over the steak and onions.

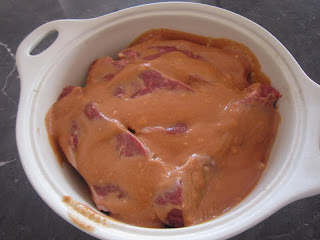
It should look like this.

Braised Steak and Onions
Precooking

Put the whole lot in the fridge for at least half an hour but longer if needs be.  (It is great for making in the morning and just popping in the oven late that afternoon.)  A couple of hours before you want to eat put in an oven at about 160-180 degrees.  The lid will need to be on the casserole.  Cook for about 2 hours, stirring occasionally.

That's it!  I serve it with vegies because we love meat and three veg in The Farmhouse.

Here is the finished product.

Braised Steak and Onions
Braised Steak And Onions 

I think I have hit a new food styling low with these photos.  Sorry - I promise it tastes much better than it looks.

I hope everyone has had a great Monday.

August 16, 2011

Sweet Potato Soup.

OK - Things have settled down enough here that I have managed to cook something half decent and take photos.  Here is my Sweet Potato Soup recipe.  It is really easy, really yummy and can be made in about half an hour.  Got to love that.  Sweet potatoes are one of my absolute favourite vegetables.  Anything that orange has got to be good. Plus the pear in this soup adds some extra flavour and sweetness.

This Sweet Potato Soup is perfect for a winter's lunch but is also light enough to be served as quite a stylish starter.

Here we go:

Ingredients


  • 2 average sized sweet potatoes (or kumaras if that's what you want to call them)
  • 1 biggish pear
  • 1 onion
  • 1 L of chicken stock
  • cream (optional)


Roughly chop the onion.  Peel and roughly chop the pear and the sweet potatoes.  Gently fry the pear, sweet potato and onion in the bottom of a heavy based pot with a little bit of olive oil.  When they are softened slightly pour the chicken stock in over the top.

It will look like this.

Sweet Potato Soup
Chopped Stuff And Stock

Then bring it to the boil and let it simmer for about 20 minutes or until the sweet potato and pear are throroughly cooked.

Then just puree the soup in whatever way you wish.  I just put it on a stable surface and whack the stick blender in.  I am all for taking the easiest option in the kitchen.  I am sure you would get better results in a proper blender but I am happy to live with the odd lump when it comes to soup.

See.

Sweet Potato Soup
Pureeing

If you like you can add some cream to taste.  I didn't for the simple reason that I had none.  Likewise some chopped fresh coriander is nice too if you have it.

The soup looks like this.

Sweet Potato Soup
Very Orange Soup

So that's it.  How easy is that?  Seriously - give it a go.

Have a good Tuesday.

July 11, 2011

Caramel Sauce For A Cold Monday Morning.

Caramel sauce is super yummy and a lovely cosy thing to make as an easy winter pudding.  Pop some caramel sauce over ice cream or some warmed cake and everyone will think you are a domestic goddess...

It is so easy to make.

Caramel Sauce
Caramel Sauce and Ice Cream


Ingredients


  • 1 cup of loosely packed brown sugar
  • 1 cup of cream
  • 200g of butter


Now the method is really easy.  Pop all the ingredients in a pot and stir until the sugar dissolves.  Let simmer for about 5 minutes and stir occasionally.  Done!

This sauce will keep in the fridge for a few days but will need heating up before use.  I use salted butter because I like a tiny bit of salt in caramel.  If you don't, just use unsalted butter.

So - there it is, yummy caramel sauce.  Not good for you in the slightest but sometimes everyone needs a bit of sweetness to brighten their day.

Enjoy Monday.

(I have linked this recipe to the Sweet As Sugar Cookies link up.  Pop over if you want some more yummy stuff to look at.)

July 4, 2011

Oxtail Soup Recipe.

There is nothing like a good soup on a cold wintery day. This oxtail soup recipe was inspired by my CWA Soups and Stews Cookbook. Now, I have a little confession, I actually modified the CWA oxtail soup recipe considerably to make a version of the soup that I knew The Farmchildren would eat.  I don't normally mess with the CWA but decided to live on the edge, just this once.

Oxtail Soup Recipe
Oxtail 


An oxtail seems to be a very old fashioned thing to cook.  I am quite happy to try different cuts of meat, although I did draw the line at the sheep's head broth recipe in the CWA book.  Can you imagine a blog post with a photo of a an uncooked sheep's head???

Anyways - if you want to channel your inner Farm Nanna and action some oxtail magic, then this is the recipe for you.  It is super easy to make but you do need to be a bit prepared and start cooking the day before you plan to eat the soup.

An oxtail is really just a cow tail. I am sure years ago it did come from an ox but, given that oxen are pretty short on the ground in modern Australia, I doubt you could find a real oxtail in many places. (I am also not sure if it would be that tasty.)  Try and get an oxtail which has been pre-cut into segments by the butcher.  Much easier that way.

Oxtail Soup Recipe
Segmented Oxtail


Ingredients

  • 1 oxtail
  • 1 litre of beef stock
  • 1 onion
  • 1 turnip
  • 1 swede
  • 1 parsnip
  • 2 carrots
  • 2 sticks of celery
  • some sprigs of rosemary
  • 1 bay leaf
  • 1/2 cup pearl barley

OK - the method is easy.  Chop the vegies up (I use a soup pack if I can find a decent looking one) and add them to the pot.

Oxtail Soup Recipe
Chopped Vegies

Pop the oxtail in too and pour the stock over the top. Add everything else except the pearl barley.  Simmer over a slow heat for 2-3 hours.

Oxtail Soup Recipe
Simmer This

When the soup is done, remove the oxtail segments and drain them. Remove the meat from the bones when they have cooled down a little. Pop the meat back in the broth and discard the bones. Then just put the whole lot in the fridge overnight.

The next day,  remove the soup from the fridge about 40 minutes before you wish to eat it.  It should have a layer of solidified fat on the top.  It is really important that you get as much of this fat off the soup as possible, otherwise it will be horribly greasy.  I didn't add a photo of this step because it looked very manky and, given that I have already discussed sheep's heads and shown a photo of an oxtail, I thought I might quit while I was ahead.

Once the fat is gone, bring the soup to a gentle boil.  Then you can add the pearly barley and simmer until it is soft.  Pop the soup in a bowl and serve it.  This makes quite a substantial soup that will easily pass as a main meal.  It would be a great recipe to pre-prepare for a casual winter lunch and serve with some crusty bread and cheese.

So there you go - how's that for some country wholesomeness on a Monday morning?

June 27, 2011

Chicken And Corn Soup For A Lazy Lunch.

This is one of my favourite soups to make when I have little time but want something yummy and healthy for lunch. The best bit is that it is the perfect way to use up left over cooked chicken. It actually looks and tastes a lot more impressive than it sounds which is always a good thing!  I originally got the recipe from a friend.

Chicken and Corn Soup
Chicken And Corn Soup

Ingredients


  • cut up cooked chicken, roughly about a cup
  • 1 litre of chicken stock
  • 1 400g tin of creamed corn
  • 1 large zucchini, grated
Chicken and Corn Soup
Ingredients

The method is so easy it is almost not worth writing down.  Throw the whole lot in a pot and simmer for 20 minutes.  Pop it into a bowl and serve with crusty bread and salt and pepper.

Yummy, healthy and super easy.  Got to love that as a concept.

I hope everyone had a fantastic weekend.  Busy weekend here on The Farm as per usual....!

June 20, 2011

Olive Oil Chocolate Cake Recipe

This is my absolute all time favourite chocolate cake recipe.  It is super easy and super yummy.  Olive Oil Chocolate Cake might sound weird but it is really fantastic.  I loved the other chocolate cake recipe I posted recently but still think this pips it at the post, mainly because it is very moist and quite dense.  Anyway, enough extolling the virtues of cake - here we go.

Olive Oil Chocolate Cake


Ingredients


  • 1 and 1/2 cups of sugar
  • 1 and 3/4 cups of SR flour
  • 1 teaspoon of vanilla
  • 2/3 cup of extra virgin olive oil (ideally use an oil that is light in flavour)
  • 3 level tablespoons of baking cocoa
  • 1/2 teaspoon bicarb soda
  • 1 cup of milk
  • 2 eggs
Ok - now this may well be the easiest cake in the world.  First of all, preheat the oven to 180 degress celsius.  Then grease and line a standard round cake tin.

Next up pop all the ingredients in your electric mixer and beat until well combined.  Pour the mixture into the tin and cook for 45-50 minutes.

Ta da - Super easy.  

I decided to try and pretend I was a food stylist when I was taking the photos for this post.  I tried so hard.  I had cute little plates, gorgeous silver teaspoons and lovely linen tea towels.  Nothing I tried worked.  All the photos looked terrible.  Beyond terrible really.  The whole thing got quite stressful, so I decided there was only one thing for it.

I gave in and ate the piece of cake instead.  Then I took this photo.

Olive Oil Chocolate Cake Recipe
Plate, Cake Crumbs

Here is the only other photo that looks vaguely presentable.

Olive Oil Chocolate Cake Recipe
Olive Oil Chocolate Cake


One thing is for sure though.  Farmgirl loved the whole cake baking process.

Olive Oil Chocolate Cake Recipe
Farmgirl, Getting Amongst It

Seriously - get baking and make this cake.  You won't regret it.

June 14, 2011

A Warming Winter Stew For A Very Cold Day.

It is a proper winter's day here on The Farm.  Cold and raining.  Given that I am married to a farmer, I know there is nothing better than a good rain in June.  To celebrate and increase the cosiness quotient, I have decided to put up my favourite winter stew recipe.  I call it my winter stew because it uses lots of winter vegetables.  It is wholesome, hearty and super yummy.

Winter Stew
Winter Stew


I use the same basic recipe for whichever type of meat I choose to use. I have tried lamb, beef and pork, all with excellent results.  I change the seasonings slightly but more about that later...  The recipe below is the lamb version.

Winter Stew

Ingredients:


  • a Soup Pack (or a swede, turnip, onion, celery and some carrots if you can't find one)
  • 1/4 of a cup of flour
  • salt and pepper
  • olive oil for browning
  • 1kg of stewing lamb/hoggett (eg shoulder) cut into 2-3 cm cubes
  • a small tub of tomato paste
  • a litre of beef stock
  • 2 tablespoons of Worcestshire sauce
  • 2 pieces of lemon rind
  • 1 tablespoon of brown sugar
  • 2 bay leaves
  • 2 sprigs of rosemary
  • 1 teaspoon of cumin
  • 1/2 teaspoon of ground corinader
  • 1 smallish cinnamon stick


This stew is the sort of thing that should be slow cooked and is perfect to make on a wintery weekend afternoon.  By dinner time your kitchen will smell fantastic.

OK - first of all pop the meat in a plastic bag with the flour and a shake of salt and pepper.  Coat the meat.  Heat a couple of tablepoons of olive( or canola) oil in a heavy bottomed pot and brown the meat in batches.  Whilst that is being done, chop the contents of the soup pack. Now this is not the time to use your best Masterchef chopping technique.  I say rustic and uneven is the way to go (and not just because I have no cheffy type technique).

See.

Winter Stew
We Love Rustic

After all the meat has been browned, pop the vegies into the same pan (you may need to add more oil) and stir until they have softened a little.  Then shake in any flour left in the bag from the meat, add the stock, tomato paste, sugar, lemon rind and herbs and spices.

A little bit more on the herbs/spices.

Winter Stew
Flavourings

For lamb stew I use what is in the ingredient list.  For beef or pork I do the same except omit the cinnamon, coriander and cumin.  I am sure it would be fine to still use them but I tend to use the Moroccan type flavourings more with lamb for some reason....

Anyway - once everything is in the pot I bring it to the boil and then turn it right down, pop the lid on and simmer it for 2-3 hours. I give it the occasional stir.  Then I serve it with rice, couscous or potatoes. (If I have made the lamb version I put some yoghurt on top too.)  I can't say how yummy it is.

May 31, 2011

Ridiculously Large Chocolate Cake. Farm Style.

I am a huge fan of Sydney Shop Girl.  She made one of my casseroles the other day and now says I am The Source for country cooking. While I think she is flattering me, I am secretly pleased because she is a fashion guru in Sydney, a mecca for style.  Whereas I am a farmer's wife in the Western Australian Wheatbelt, a mecca for dust.

Anyway, given my new found status as "The Source", I decided to get all adventurous and experimental and try a new recipe.  I know, living on the edge here people.  My Mum was given a recipe for a chocolate cake that was made in a baking dish.  Given that I have a baking dish and an oven, I thought "Why not?"

So, without further ado, here is the resulting adventure.

To start with I ventured into my pantry.  I dodged the many bristling mouse traps (I am ever vigilant in The War On Rodents) and came out with these ingredients.  Except the eggs, I got those by braving the snake ridden chook pen (OK - the snakes should be hibernating so this was not as risky as I am trying to make it sound).

Ingredients

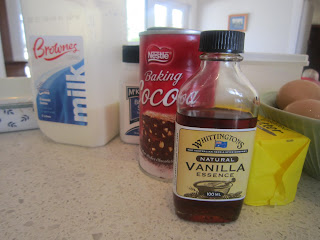
Ingredients:


  • 3 cups SR flour
  • 2 & 1/2 cups sugar
  • 3/4 cup cocoa
  • 2 & 1/4 teaspoons bicarb
  • 250g butter, melted
  • 2 cups milk
  • 2 teaspoons vanilla
  • 6 eggs (that's a lot, isn't it? - oh well, I have chooks and I am not afraid to use them)
To start with I needed to sift the flour.  This is when I got really reckless.  I let Farmgirl do the sifting....

Almost 4 Year Old With Sieve, Don't Try This At Home

Then I added the sugar, cocoa and bicarb.  I was too traumatised after the flour sifting to sift these,, so I just whisked through all the dry ingredients in the bowl a few times.

Slack Sifting

Then the eggs needed to be whisked and added.  After that I poured in the milk, vanilla and melted butter.  As my bowl was almost overflowing I tipped the whole lot into my super glamourous pistachio KitchenAid and gave it a whirl.

Looking Good


I wasn't sure how "mixed up" it was supposed to be but thought the above looked about right.

The next step involved lining a baking dish with baking paper.  So I did. Then I tipped the cake mixture in and had second thoughts.  Because the dish was this full.

Uh Oh

Although I am all for exciting kitchen adventures, I decided that discretion was the better part of valour.  To avoid spending the rest of the day cleaning burnt cake mix off the oven shelves, I quickly lined another dish and put some of the mixture in there.  So there was a big cake and a baby cake.

Cakes Breed In The Farm Kitchen

The whole lot then went in a moderate oven.  The recipe said the cake should take an hour and a half.  I think if I had made it in my big, whopper baking dish then this would have been about right.  As it was, I took the little cake out after an hour and ten minutes.  The big one took about an hour and twenty minutes.

The cake(s) turned out really well.  Light and yummy.  I may or may not ice them.  Apparently they freeze well.  This can only be a good thing as I seem to have an awful lot of chocolate cake here...
Cake, With A Light Dusting Of Icing Sugar For Styling Purposes

This would be a great recipe for a cake stall or if catering for workers.

So there you go.  Have a good day, wherever you are.

May 24, 2011

Super Easy Beef Casserole aka The Reason I Failed Masterchef.

Am I the only person in Australia that finds the reality TV show Masterchef slightly annoying?  Actually to be honest maybe a bit more than slightly annoying.

There is something about it that I just don't quite connect with.  I think it is something to do with how ridiculously stressed the contestants get and how they create drama for drama's sake (but then that is what TV shows do).  Or maybe just that I get enough of real life every day and prefer a bit of escapism on the telly.  Who knows?  Given that the Masterchef creators are laughing all the way to the bank, I don't think they will be too worried about my opinion.  Someone who throws tins of soup into recipes with as much relish as I do, would not be an ideal contestant anyway.

I was thinking about this while I made my very favourite, easy beef casserole.  Mainly because it breaks lots of rules of casserole creating.  So yummy though. My lovely Mum has made it for years and years.  The Farmer can also remember his grandmother making it when he was young, so I think it is an old country recipe that has done the rounds. It freezes well, everyone eats it and the ingredients are available easily.  Ticks all the boxes (that one was for you Pilbara Chick).

It looks like this when it's done.

Masterchef Eat Your Heart Out

The ingredients are simple.


  • 700g stewing steak cut into stewing size chunks (tell me you know what I mean)
  • 2 tablespoons of plain flour
  • salt and pepper to taste
  • 1 tablespoon of brown sugar
  • 1 onion cut into rings
  • 250g of prunes
  • 1 cup of water
  • 1 tablespoon of apple cider vinegar
  • 2 teaspoons of soy sauce
  • 1 tablespoon of fruit chutney

Ingredients Photos Make Me Feel Organised

Place the stewed meat in a bag with the flour, salt, pepper and brown sugar.  Shake it until the meat is well coated.

See.

Meat - Well Coated!

Then mix the coated meat, prunes and onion in a casserole which has a lid.

Mixed Up

Combine the water, vinegar, soy and chutney in a jug and pour over the top.  (I didn't put up a photo for this bit because a. I think you can work it out and b. the photo I took looked just like the above only wetter).

Pop the lid on the casserole dish and place in a 150 degree celsius oven for 1.5 to 2 hours.

This makes a very yummy family meal - I would normally serve it with rice or couscous.  Kind of vaguely Moroccan in a retro 70s kind of way.

(Quick question - do people find my recipes useful? or do they bore the pants off you? I am thinking about the general direction my blog is going in as it is all quite random at present.  Knowing me though it will stay random...)